


Introducing the Wrapper Kit – A Complete Crafting Solution for decorating your 24oz Snowglobe!
ES Vinyl and Craft Ltd has teamed up with The Doodle Pixie to bring you the ultimate all-in-one kit.
No stress, no complicated cutting – just everything you need to decorate your 24oz Snowglobe and make it truly shine.
✨ Whether you’re brand new to Vinyl or a Cricut pro, the Wrapper Kit makes crafting fun, simple, and stress-free.
Each Wrapper Kit is printed in-house, by ES Vinyl and Craft, on a professional Roland UV Printer and comes ready to apply straight out of the box.
What’s the Difference Between Base & Peekaboo Kits?
Base Kit – A full wrap design that completely covers your 24oz Snowglobe for a bold, all-over look.
Peekaboo Kit – Comes with extra “cut-out” sections that let more of the gorgeous glitters or mica show through.
Both options are available on two stunning vinyl finishes:
🌟 White Vinyl – Classic Oracal 651 Glossy Permanent Vinyl, crisp and vibrant.
🌟 Holographic Vinyl – Teckwrap Holographic Rainbow Silver Permanent Vinyl, shimmering with rainbow reflections.
Your Choices:
Base Kit – White Vinyl
Base Kit – Holographic Vinyl
Peekaboo Kit – White Vinyl
Peekaboo Kit – Holographic Vinyl
Please see link to our 24oz Snowglobes!!
🎨 With the Wrapper Kit, decorating has never been easier or more enjoyable. Just follow our simple step-by-step instructions and watch your Snowglobe transform into something magical.
📸 Please note: The Teckwrap Holographic option is even more stunning in real life than photos can capture – please feel free to check out our socials on TikTok where you can see the real beauty of the Holographic Vinyl @teckwraptime
✨How to Assemble Your ES x Pixie Kit ✨
🛠 Tools You’ll Need
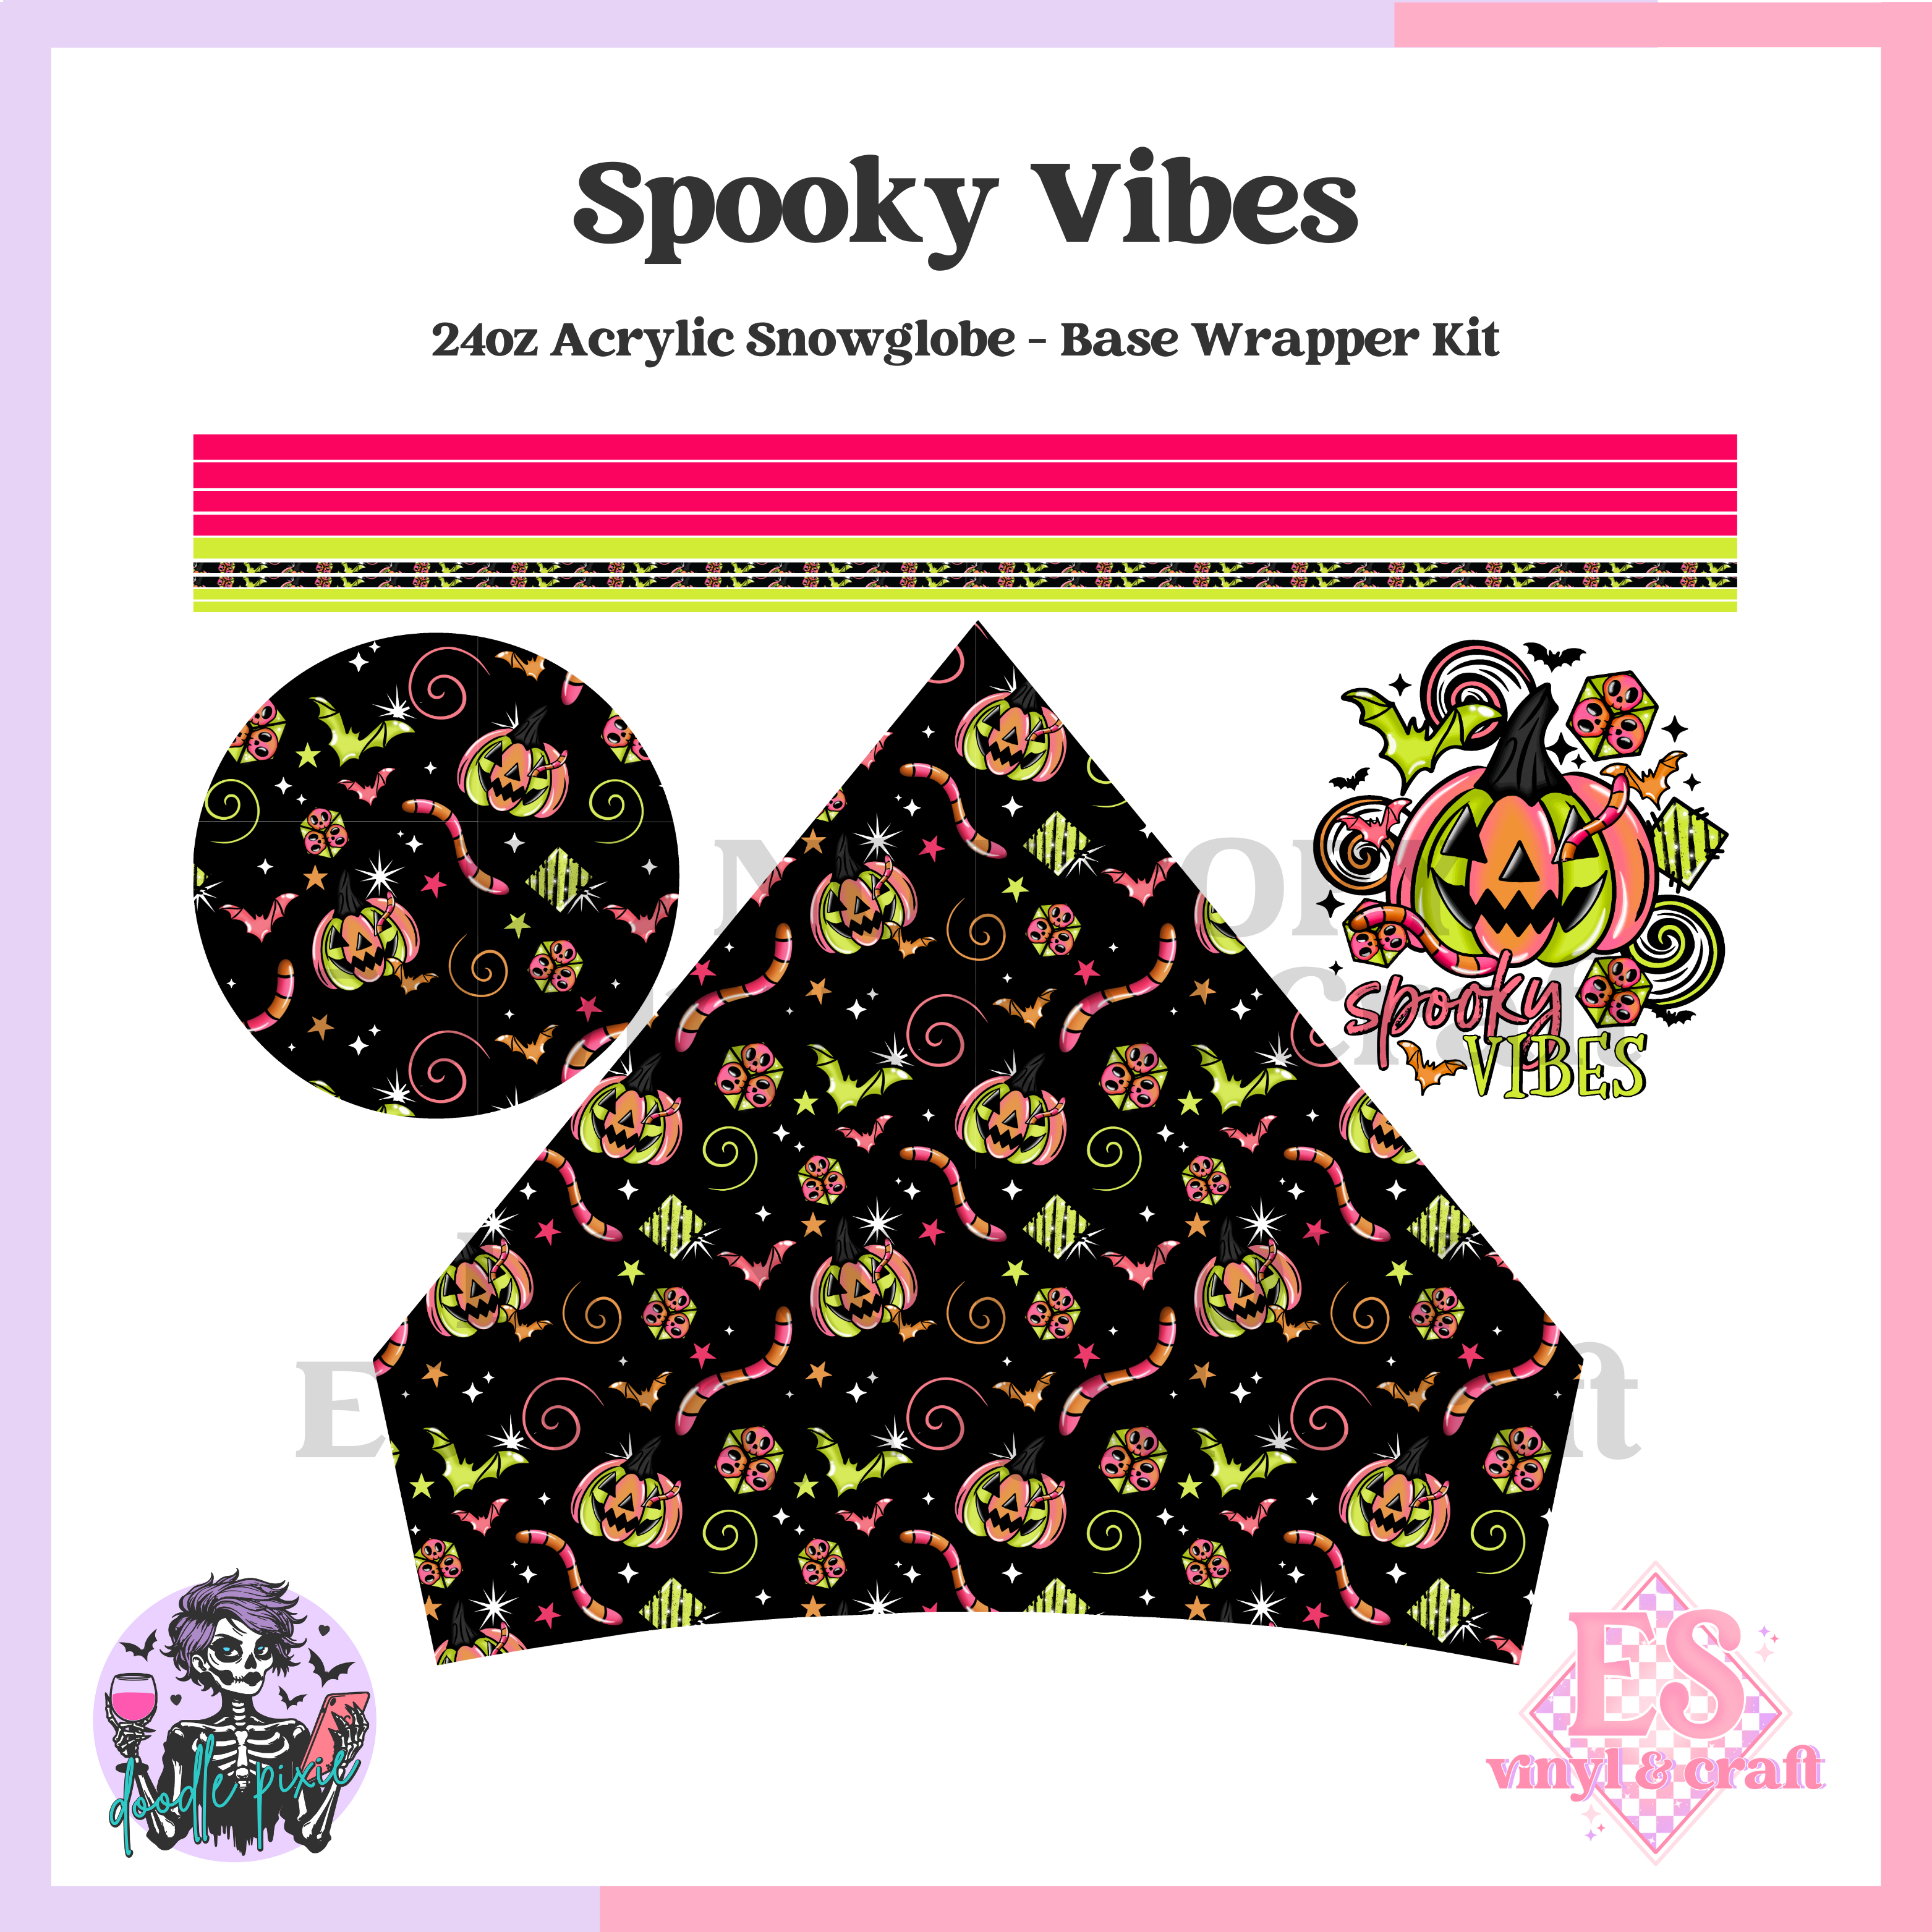
📦 What’s in Your Kit
- A – Body piece
- B – Decal
- C – Lid piece
- D – Top and Bottom pinstripes
- E – Outer V pinstripes
- F – Lid pinstripe
- G – Inner V pinstripes (choose patterned or plain)
📝 Step-by-Step Instructions
- Weeding Your Vinyl
- Your kit arrives unweeded.
- Use tweezers or a weeding pen to remove the top vinyl layer, leaving pieces A–H behind. If you are unsure of what to leave behind, please refer to the weeding image that is Green on the item listing.
- Check your decal (B) in case it has any parts needing weeded (see image for examples – typical spots are between letters or elements) and need these.
- If your kit is a Peekaboo kit, also weed out the inner sections of the peekaboo design (see image for example).
- Applying the Body Piece (A)
- Apply transfer tape over A to lift it cleanly.
- Line it up and carefully place on your cup.
- Smooth it down with a squeegee to remove bubbles.
- You can peel back and reposition if needed — just avoid stretching the vinyl.
- Don’t stress about being a little off — pinstripes will help cover small imperfections.
- Adding the Pinstripes
- Step 1: D → Wrap these around the top and bottom of the cup.
- Step 2: E → Apply these along the outer edges of the V split.
- Step 3: G or H → Apply these along the inner edges of the V split.
- Choose patterned or plain for a little extra customisation.
- Step 4: F → Wrap this around the edge of your lid.
- Finishing Touches
- Apply B (Decal) and C (Lid) as your final decorative details.
✨ Done! Your ES x Pixie cup is now ready to shine ✨